Please refer here to, mainly, a Picasa Web Album.
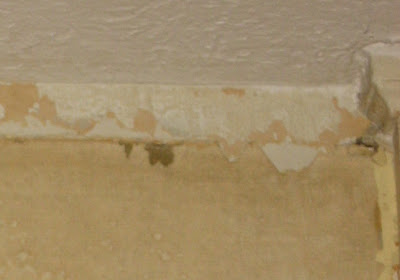
Heavy wallpaper can make for tolerance of badly-cracked plaster walls. Fixing the walls is a very large commitment. Here is initial revelation of a wall, using a steamer. Wallpaper removal must be complete.
Please read on, at the album.
This blog will detail the advocacy of a superior “flexible grout” as an element of wall and ceiling repair and finishing. The material is attributed to chemistry inventions of my twin brother, Paul Norman. I offer free samples upon sincere query, with mutual promise of blog-posted, unedited discussion. We will agree that any differences of view will be addressed by comments to a posting. Contact me: pjnorman@gmail.com Portland, Oregon, phone 503-255-4350
Monday, September 6, 2010
Friday, September 3, 2010
Patching a Failed Ceiling Drywall Seam
Drywall butt joints CAN be made to survive, without taping. Here is repair of a failed not-taped butt joint, in a house built in 1951. An uninterrupted crack ran the 24' length of a living room ceiling. One or several mud repairs, made matters worse.
I guarantee my work indefinitely, and am never called with complaints. I asked for feedback, for reassurance of an interested home owner in Omaha, at September, 2010. This customer, and the others, responded with compliments and kindness.
| 11:00 AM. Scraping in process. This was two thirds of the job. |
| 4:36 PM. The completed patch, filled with flexible grout. |
| 2/1/2009, 3:33 PM. Texture wider view without flash. |
Please know I am eager for faster progress in sharing this product with the world. My scale remains tiny, with batches of a pound or two, lasting me for weeks. From tubs, without de-aeration, product remains workable for weeks, and I dispose of very little. I imagine best packaging will be with evacuated fill of caulk tubes. I will invest in larger scale, as demanded.
Mention of Custom Tile Grout in My Principal Blog
At 6/10/2026, share mention that Custom Fusion Pro Grout has many of the properties of my Flexible Grout, and must be chemically similar.
In my experience, Custom Fusion Pro has infinite pot life, always of useful wet consistency
Friday, August 13, 2010
Attic Ladder Edges, Always
Flexible Grout is useful in every one of my attic ladder installations. With variable condition of door face and ladder frame face, vs. ceiling plane, I never find advantage in use of edge molding.
Wednesday, March 17, 2010
An Annular Patch, of Structolite and Flexible Grout
From the attic, I had seen a lot of light through a collar-hidden annulus of the wood stove flue ceiling penetration. Maximum gaps are about 5/8", and the ceiling drywall is fractured above face paper. I can't close the gap with flexible grout alone, over more than half the circumference. With this prep, the plaster securely bonds to the ceiling-set ring, and to drywall edges. Plasterweld would have almost no value here.
Sunday, November 29, 2009
New Methods in a Typical Attic Ladder Patch
When I install an attic ladder in a lath & plaster ceiling, I have an added patching job if I have replaced a larger ladder. In this case of a new ladder installation, there might have been little or no patching. However, the ceiling was cracked and detached from wood lath near a decommissioned chimney. I liberally pulled off loose plaster to allow reset of wood lath, adding new wire lath where possible.


The wire lath is strongly attached with screws. All edges are fully bonded with flexible grout, applied to surfaces very wet from water spray. As in small-crack repair, the grout flows best with local dilution. Plaster can not flow into thirsty edges. Edge preparation with Plaster-Weld adds no mechanical strength or restraint of wire-lath ends.


Here, all wood lath and broad original plaster surfaces are coated with Plaster-Weld bonding agent, applied by brush.
The patch of Structo-Lite Basecoat Plaster is applied in two steps. Here a good match of surrounding texture was achieved by simple striking with a 4-ft Feather Edge. Dark detail in the patch is spot application of flexible grout to correct under-fill or to add texture.
Please note the ladder appearance, blending with the ceiling, never using trim molding. All ladder frame edges are bonded-in with flexible grout, fairing in a very uneven plaster surface. With best fit of the ladder frame, level, the ladder frame is about 1/8" proud of plaster along the hinge end, and about 3/16" recessed from plaster at the center of the near long edge. Molding is needed by anyone else, lacking flexible grout. Molding can never be relied-upon to seal clearances between the ladder frame and the ladder rough opening.
The ladder is a rugged and simple Calvert Model 1026. My trademark safety pole with hand grips is visible through the opening.
Thursday, August 28, 2008
Fixing a Cracked Plaster Corner with Metal Edge and Flexible Grout

Defects at this corner in a high-traffic hallway were particularly daunting to the homeowner, leading to a call for help after attempted painting prep with removal of kitchen wallpaper. Enamel finish is poorly bonded. A horizontal crack is bulged out. A vertical crack 1 1/2" from the corner is unstable. Old repairs with paper tape and mud have come undone.
Here the corner is ready for grouting. No cracks are large enough to permit repair with plaster. If the only tools in the box were brittle setting mud and Fix-It-All, one would choose Fix-It-All. "Durabond" is sometimes recommended, but that is just a brand name for setting mud. A flexible and adhesive patch material will survive corner impact: my flexible grout.
All filling was done in about three troweled applications of flexible grout. The final result met the goals of prep: nothing to be seen, and confidence in durability.
The adjacent enamel paint edges are sandably stabilized by the flexible grout. The enamel adhesion is poor, but I had to stop peeling somewhere. This will hold. Where adjacent paint is latex and also not well bonded, the flexible grout is even more useful. Water in mud tends to aggravate the paint release; not so flexible grout with its acrylic base.
Saturday, August 23, 2008
Grout at a Ceiling Edge

This is a common situation with plaster crack repair. A 1/4" drywall covering of ruined ceiling plaster was dressed at edges with paper tape. The walls were good enough, where several layers of wallpaper concealed cracks. Several more layers of wallpaper were applied through the years after the ceiling improvement. Now, I have the job of fixing the cracked plaster walls. The tape up onto the ceiling is simply razored into the corner, to retain texture.

Mud would NOT last here. Retaping the corner would be painful, with spread of texture damage on the ceiling from troweling and wetness. Fix-All might survive if pushed into the gap, but application would be aggravating, with short pot life, and with difficulties of cleanup.
I wet the gap by spray bottle as I progress, and push flexible grout into the gaps, by fingertips. The application will be easier yet, dispensing grout with caulking tubes. Going around again if necessary, I can spot-apply a matching texture pattern with flexible grout.
Subscribe to:
Posts (Atom)